A geofence is a virtual fence (a rectangle around a certain location) that you can set using the Trackimo dashboard. When the device crosses the virtual fence, you will receive an email alarm message with information of when the device has crossed the virtual fence.
Creating a GeoFence
To setup a GeoFence:
- Click on the Fence button in the device menu.
- Click on the “Create a new fence” button, this will open the new fence options below the button.
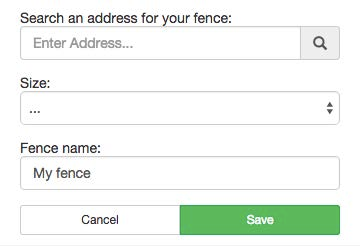
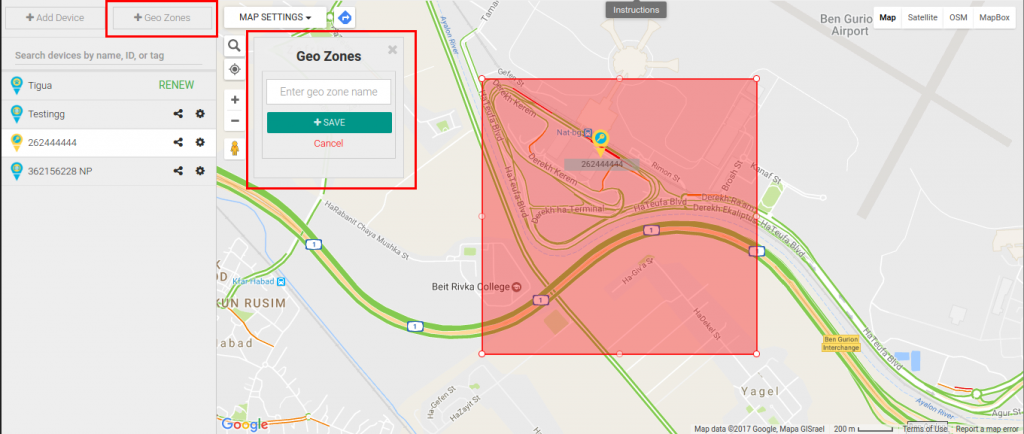
- You will then have the option to search for an address for your fence and set a perimeter. A red rectangle will appear on the map representing your GeoFence. You can then move or resize your GeoFence directly on the map.
- When done, give your fence a name in the new fence options and click on Save to save your GeoFence.
- Your fence cannot be smaller than 200 meters (218 Yards).
Modifying a GeoFence
- Click on the Fence button in the device menu.
- Click on the fence name you would like to modify.
- The map will center on the fence and the fence will be displayed as a red rectangle on the map.
- Click on the Edit button.
- You will then have the option to search for an address for your fence and set a perimeter. A red rectangle will appear on the map representing your GeoFence. You can then move or resize your GeoFence directly on the map.
- When done click Save.
Deleting a GeoFence
- Click on the Fence button in the device menu.
- Click on the fence name you would like to modify.
- The map will center on the fence and the fence will be displayed as a red rectangle on the map.
- Click on the Delete Button.
- Your fence will be deleted.
![]()