After logging in to the Trackimo website with your username and password, you will reach the Trackimo dashboard. The image below depicts the Trackimo dashboard with a short explanation in the table below about the key items within the dashboard.
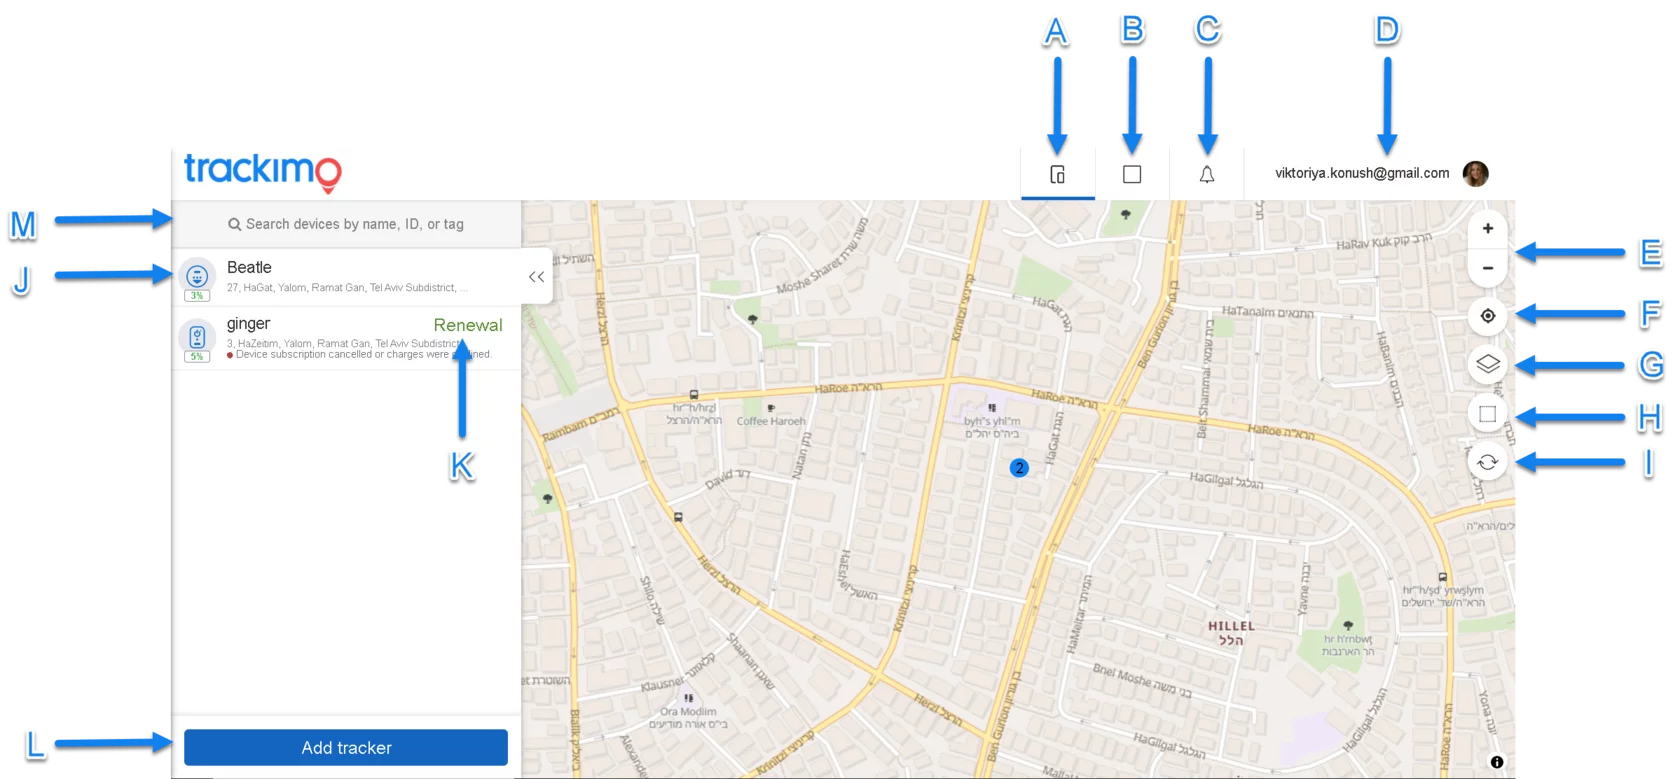
After logging in to the Trackimo website with your username and password, you will reach the Trackimo dashboard. The image below depicts the Trackimo dashboard with a short explanation in the table below about the key items within the dashboard.
On the homepage, you can see all your Trackimo devices as they are located on the map.
Opens a search bar to find specific Geo-fence.

Displays the number of unread device notifications. Clicking on this icon redirects to the page where you can choose the device, type of notifications and the time period these notifications were received within.

Shows account email address, clicking on it opens a menu with options to access account settings, get help, log out, ect.
Allows you to zoom in and out the view of the map
Shows your current location.
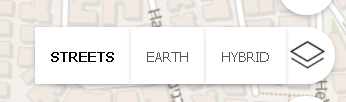
Allows to switch the types of maps between the default street view, satellite earth view, or hybrid of both.
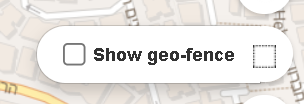
Opens a checkbox to enable/disable showing geo-fences on the map
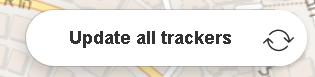
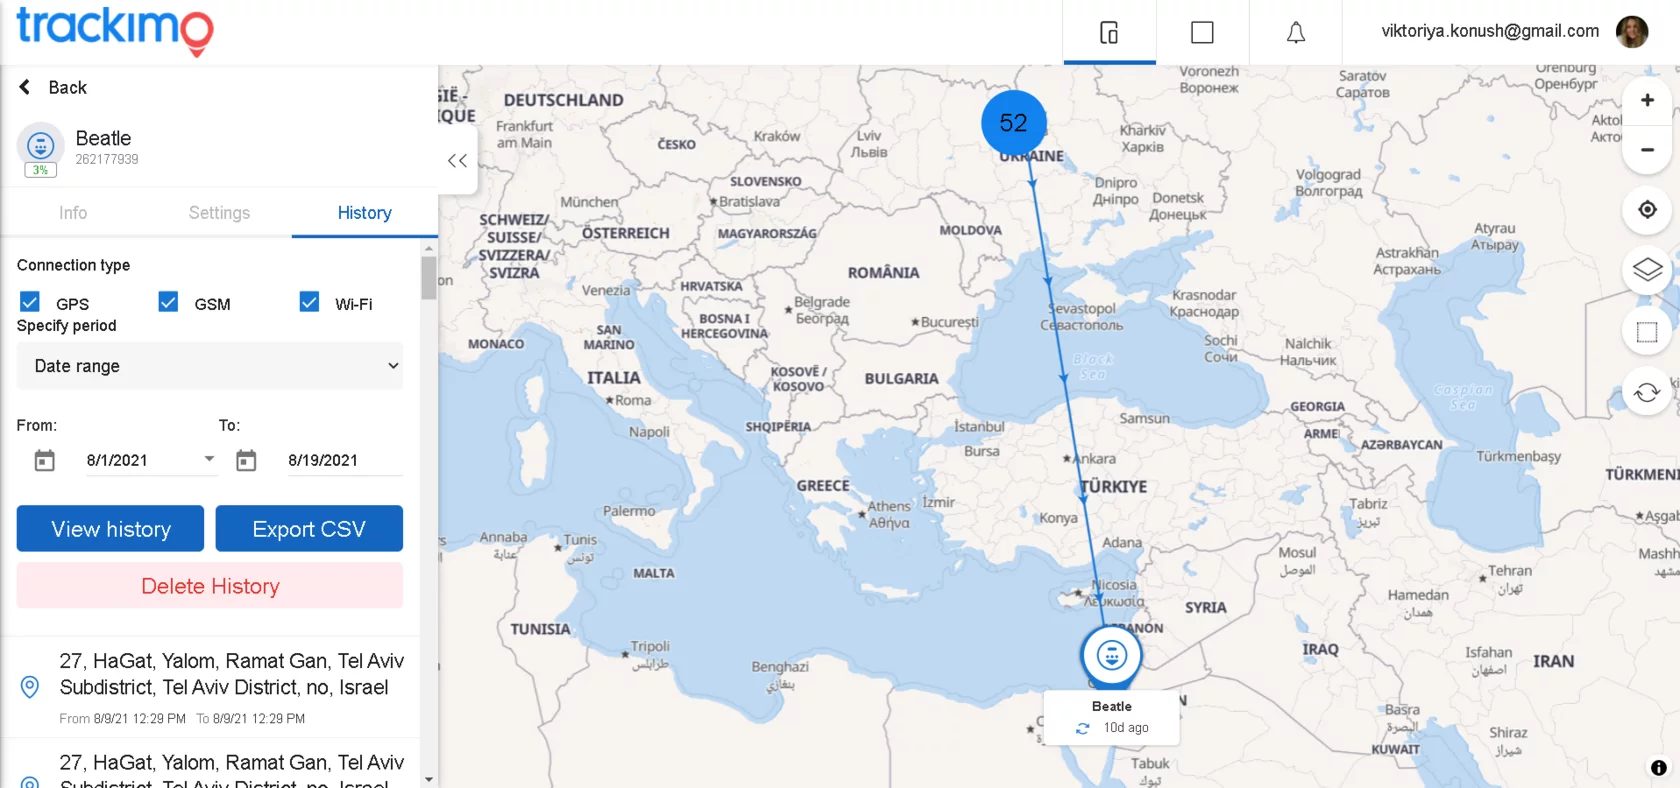
Allows you to get the current device(s) location on the map. Clicking on this button on the general devices view map will update location for all devices. If you open a specific device on the left sidebar – it will update the location for the specific device.
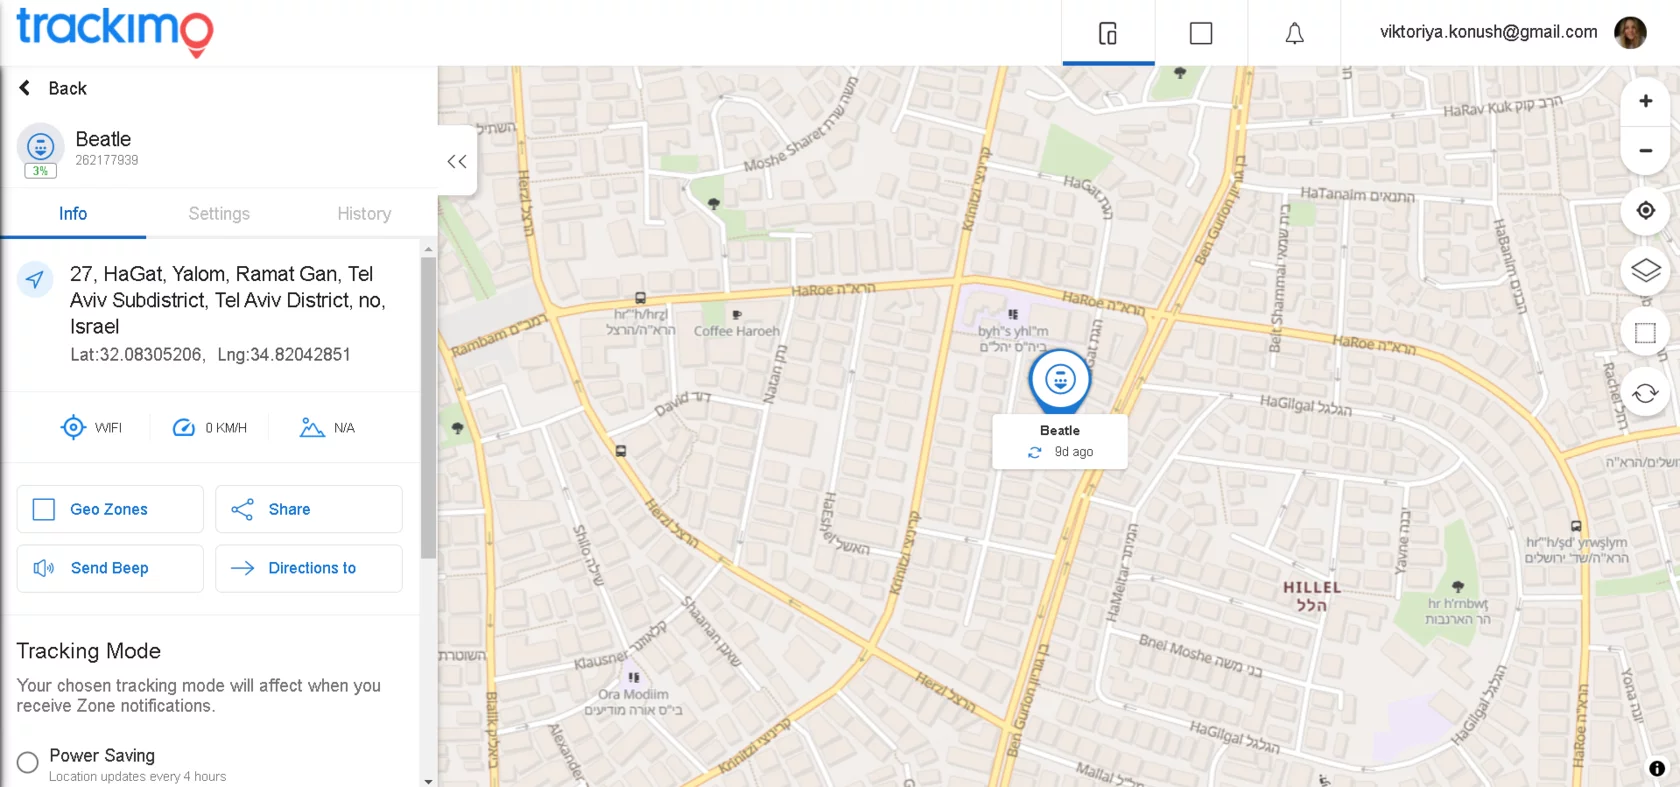
Displays the device name with its current location. Clicking on the device name will open a detailed device information, settings and history of the device.
Allows you to activate the new device.
Allows you to search by the Device name, ID or tag.
There are two ways of accessing device location:
1. By clicking on the device icon on the map – the location information will appear on the left sidebar;
2. When clicking on the device name on the left sidebar.

Clicking on the device name on the left sidebar opens the device’s information, settings and history tabs.
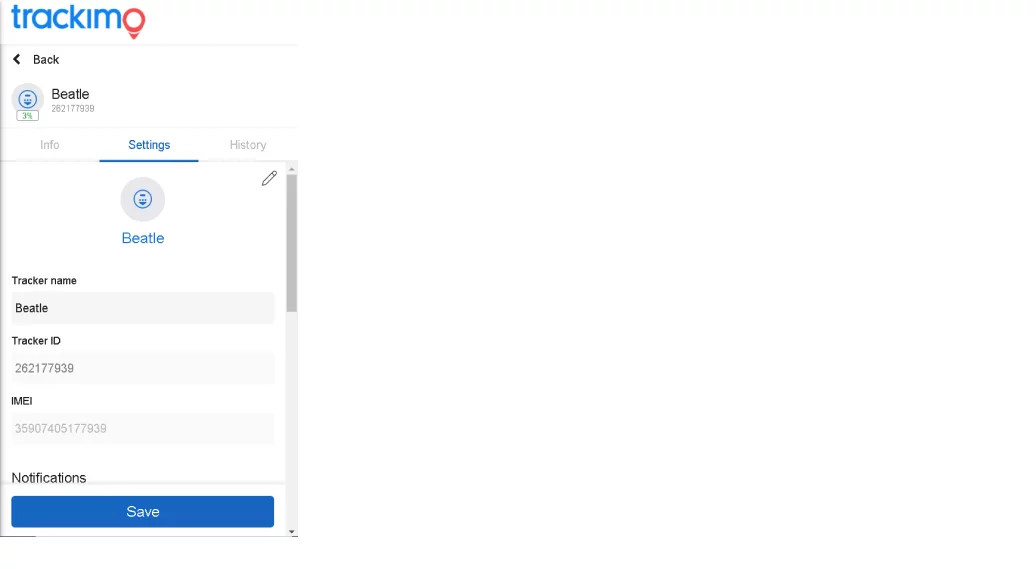
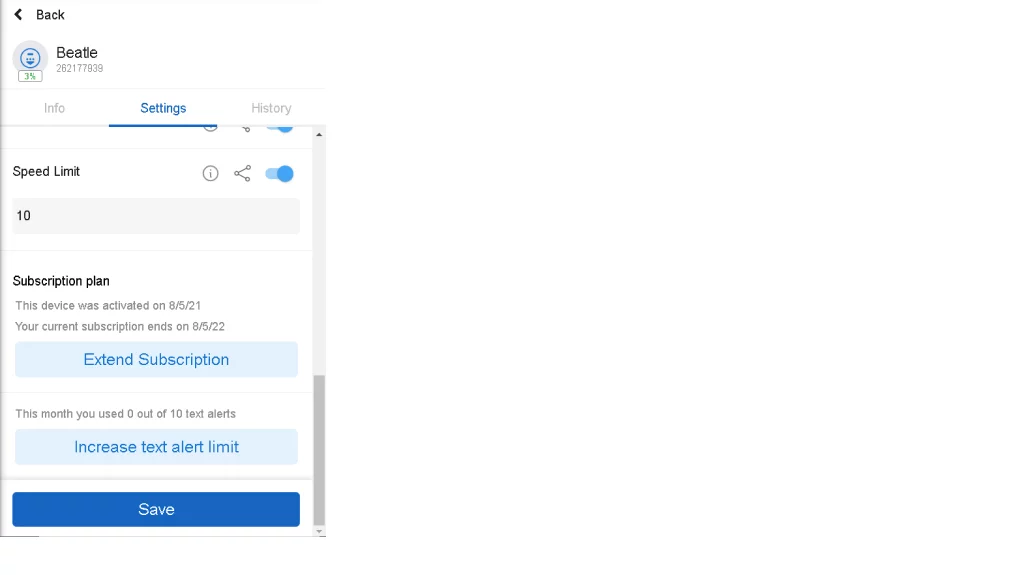
The second tab called “Settings” is where you can change the device photo and name, see it’s ID and IMEI:
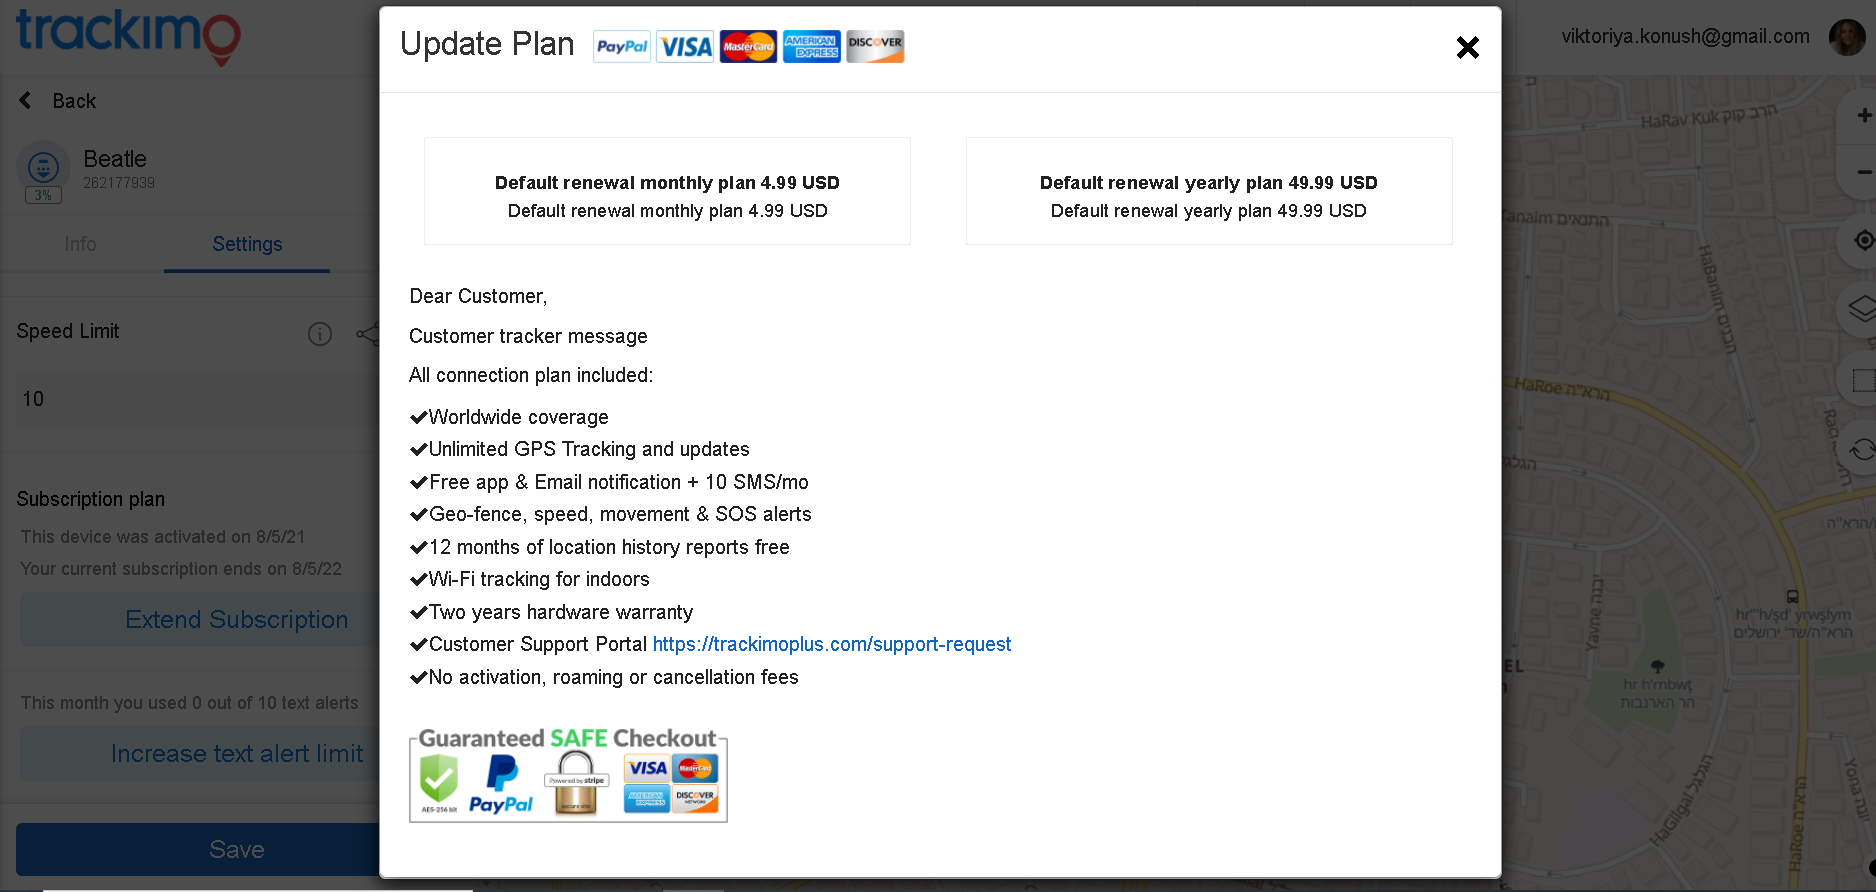
As you click on Settings tab on the left sidebar and scroll to the bottom, you will see the subscription information(device activation date and subscription expiration/renewal date):
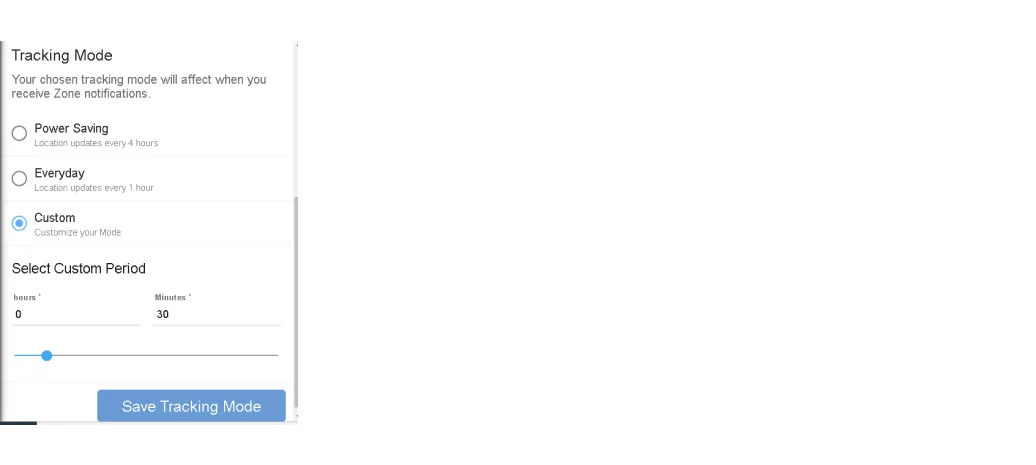
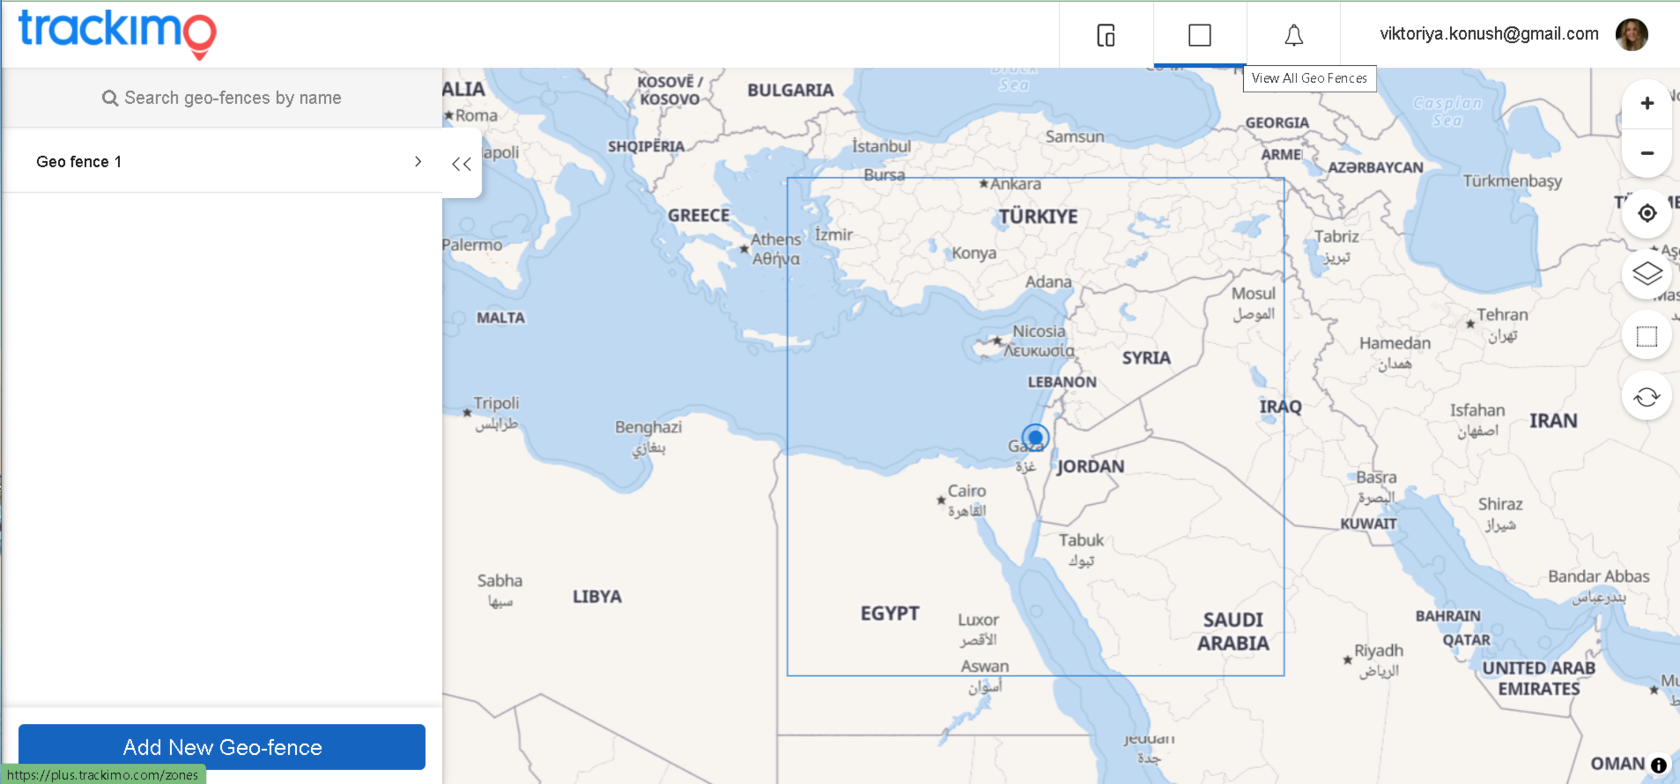
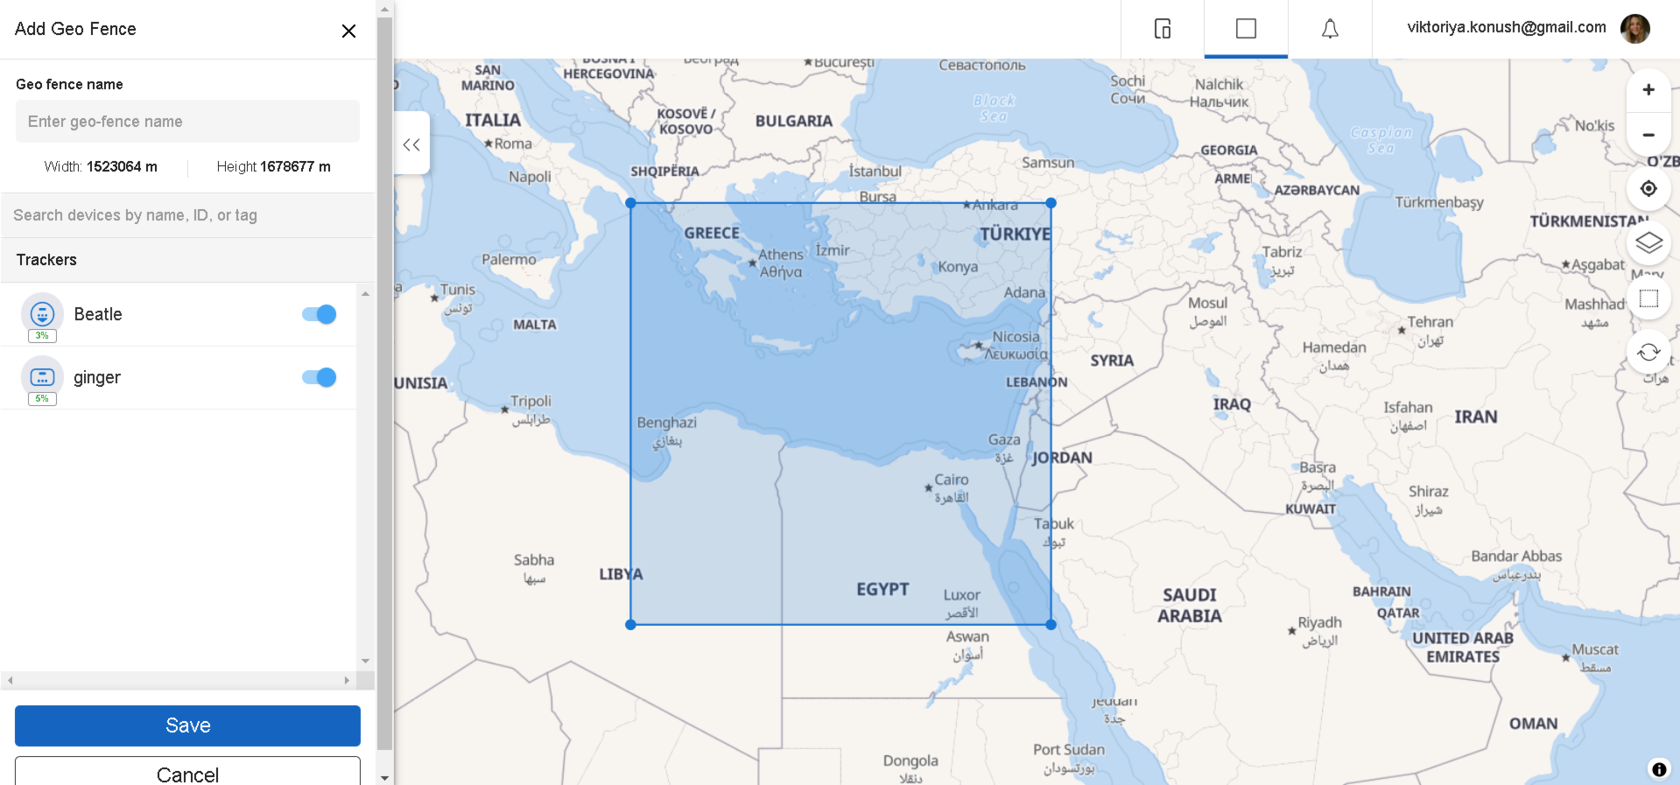
A geofence is a virtual fence (a rectangle around a certain location) that you can set using the Trackimo dashboard. When the device crosses the virtual fence, you will receive an email notification message with information of the time the device has crossed the virtual fence.

 The following notifications are available:
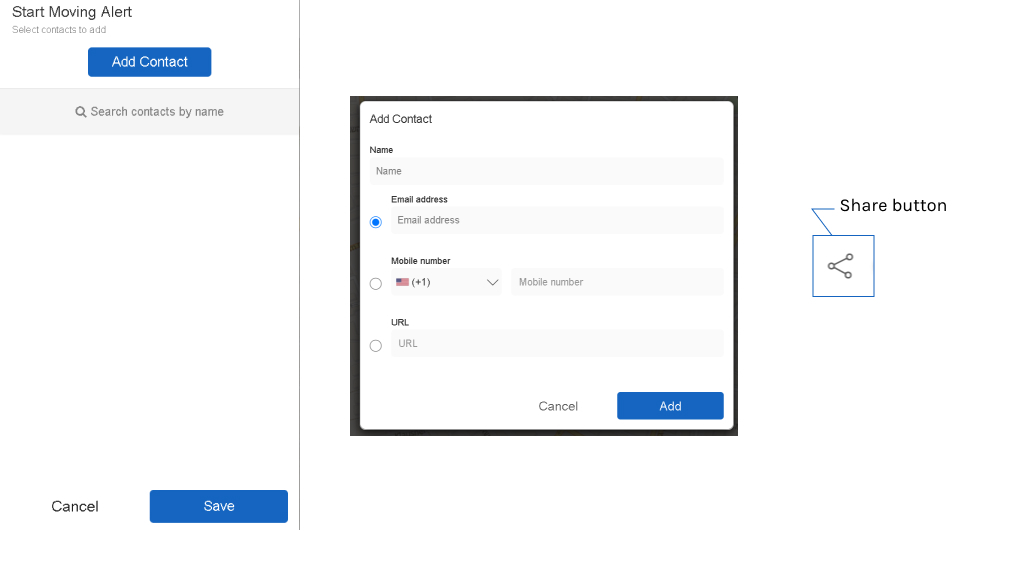
 Increase your monthly text alerts limit
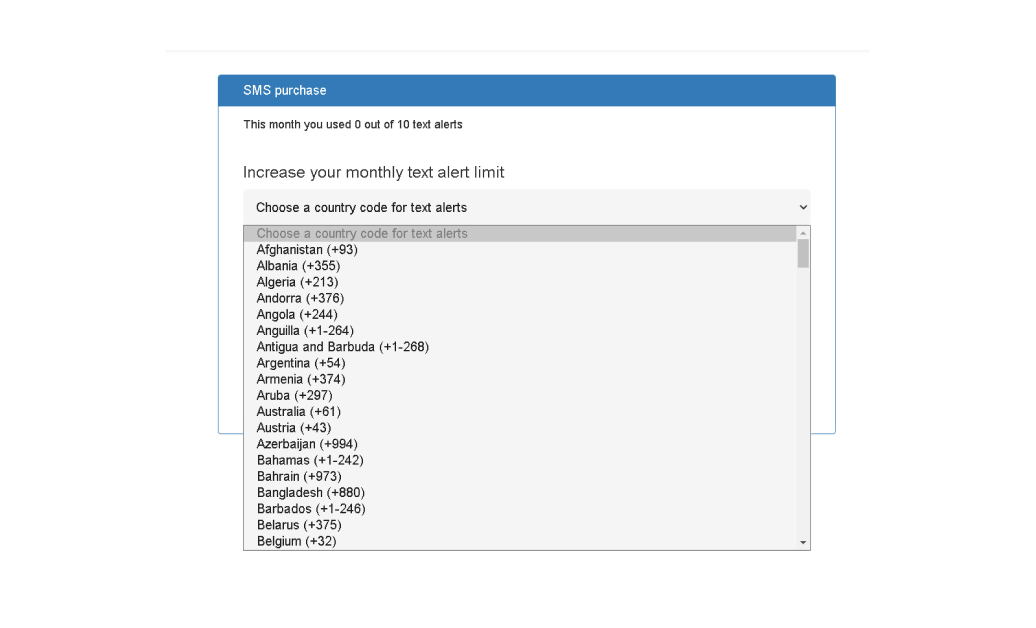 Depending on the country code you will be provided with the SMS limit options* to purchase:
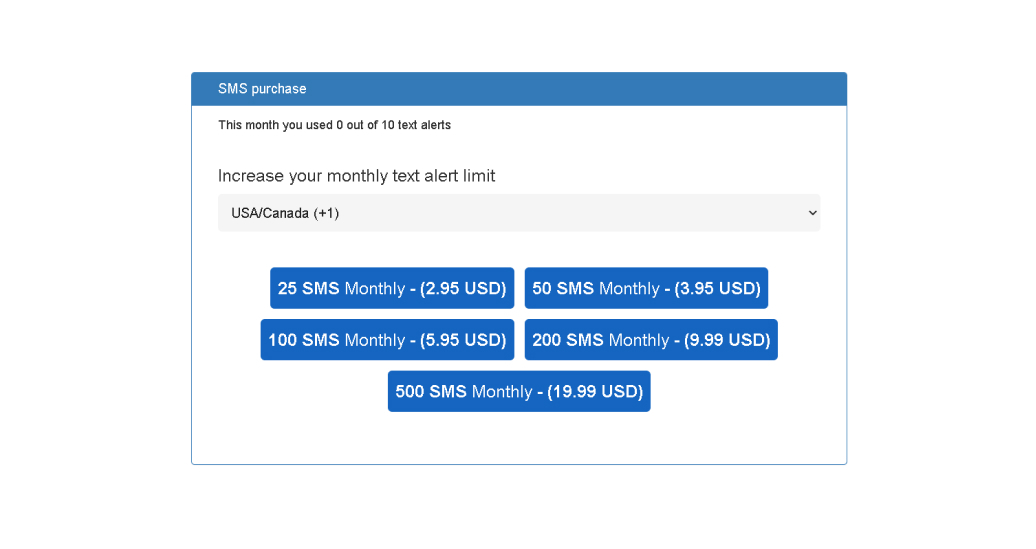 *Different country codes will display different numbers of possible SMS limit options and different prices accordingly.
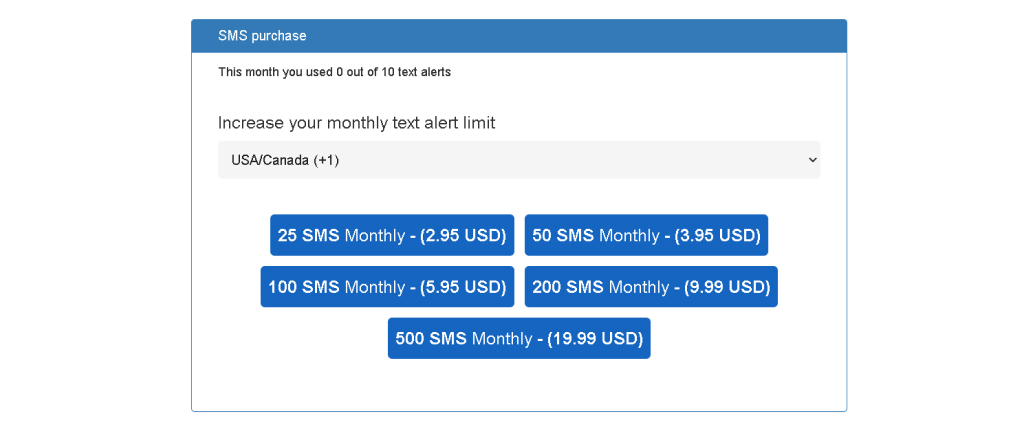
 Editing a GeoFence:
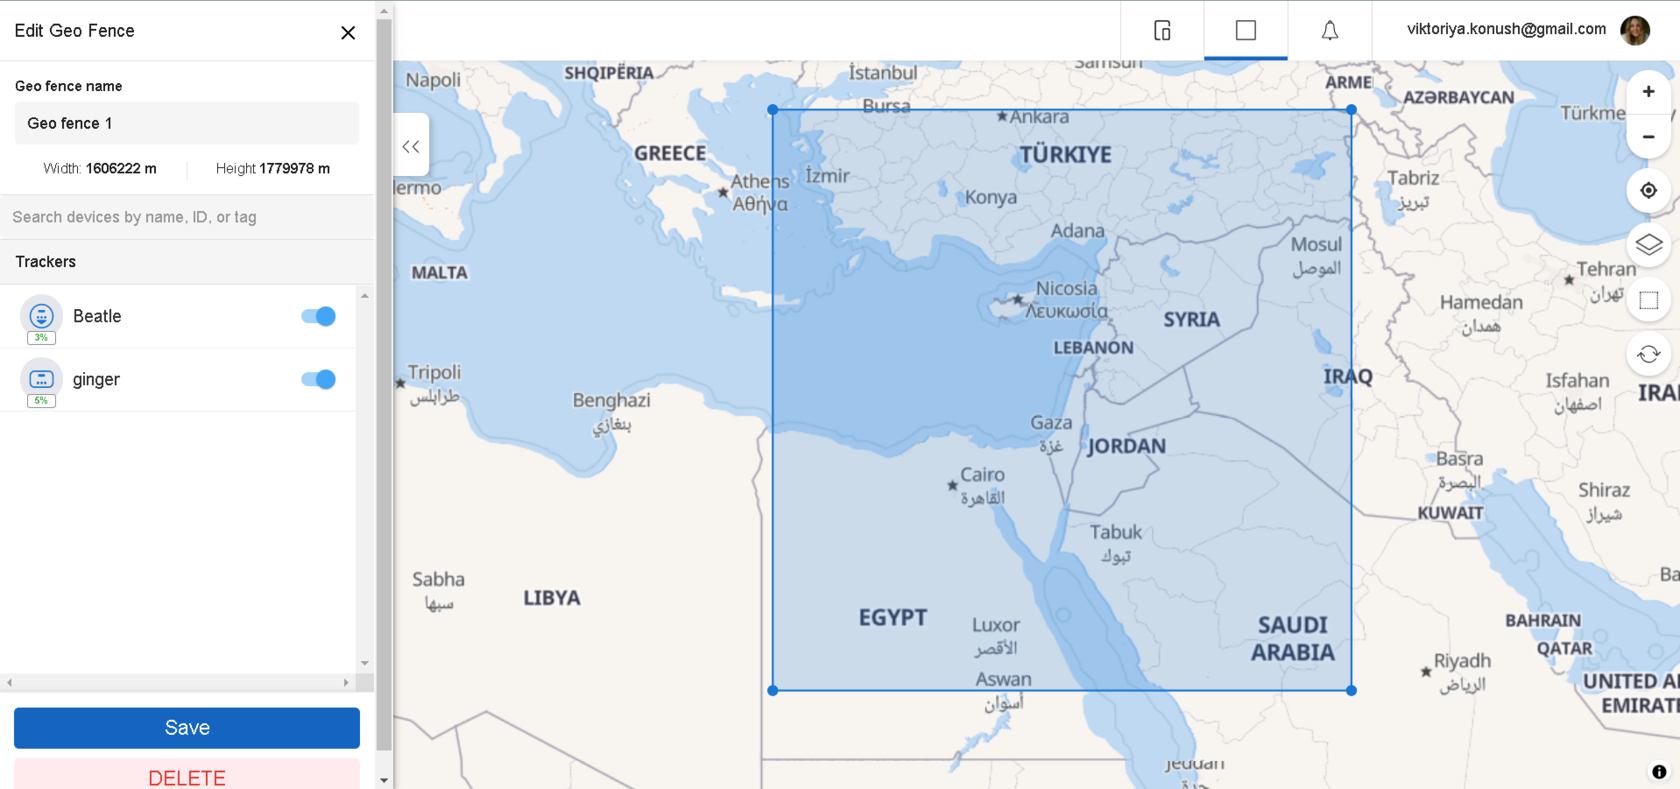 Deleting a GeoFence: