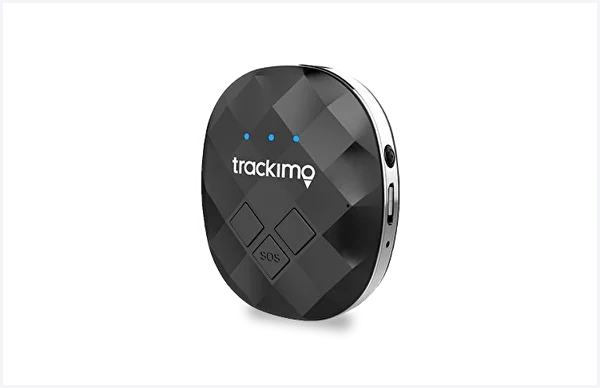
Guardian 2G & 3G

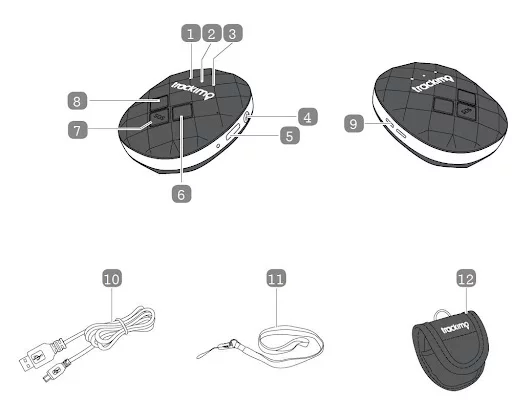
Package contents / Product parts

  1. Green Light

  2. Red Light

  3. Blue Light

  4. On / Off Button

  5. Charging Point

  6. Right Button

  7. SOS Button

  8. Left Button

  9. Speaker

  10. Charging Cable

  11. Lanyard with Clip

  12. Pouch

General Information

These operating instructions are for the Trackimo Universal 2G / Universal 3G Tracker, which will simply be referred to as ‘tracker’ in the following. They contain important information regarding set-up and operation. Before using the tracker, please read the operating instructions carefully. This particularly applies to the safety notes. Failure to adhere to these operating instructions may result in severe injury or damage to the tracker.

The operating instructions are based on the standards and rules in force in the European Union. When abroad, you must also observe country-specific guidelines and laws. Keep the operating instructions for future use. If you pass the tracker on to third parties, please be absolutely sure, to include these operating instructions.
Initial set-up

INSTALLING AND CHARGING THE BATTERY

When you unpack the tracker for the first time, the battery is empty. Charge it as follows:

  1. Connect the charging plug of the charging cable to the tracker with the magnetic charging port.
  2. Connect the other end of the charging cable to the USB power adaptor and then to the power socket. Alternatively, you can also connect the charging cable to a computer.
  3. Charge the tracker for 12 hours. The red light will blink whilst
    charging. When the tracker is fully charged, the light will turn solid red.
  4. Disconnect the tracker from the charging cable.
TURNING THE TRACKER ON
  1. Take the tracker outside so that it is in the open air.
  2. Press and hold the ON/OFF button for at least 3 seconds.
    The green light on the front will start to flash.
  3. Put the tracker down and wait forat least 15 minutes.

The tracker will carry out initial GPS positioning. This is required for the device to function correctly. The tracker will then be ready for use and can be activated.

Please note: this procedure is only required the very first time the tracker is turned on.

ACTIVATING THE TRACKER
  1. Open your Internet browser and go to the following website: www.trackimo.eu
  2. Select your language.
  3. Click on “Activate” and follow the on-screen instructions.
  4. Insert your tracker IMEI and Device ID, and follow the instructions to activate your price plan.
OR
  1. Download the Trackimo app from the Apple Store or Google Play.
  2. Register or log into your Trackimo account.
  3. Select “Activate device” in the operation menu and follow the instructions.

Functions

BUTTON FUNCTIONS
ON/OFF

Press and hold the ON/OFF button to turn the tracker ON or OFF. Briefly press the ON/OFF button once to check whether the tracker is on.

Please note: If the green light flashes, the tracker is ON. If no light comes on, the tracker is OFF.

LEFT / RIGHT

If you press one of the two buttons, you can send a message to the telephone number or e-mail address you have provided. It shows the following text message:

"Left button pressed" or "Right button pressed".

SOS

If you press the SOS button for at least 2 seconds, the location and a text message will be sent to the telephone number or e-mail you have provided.

GEOFENCING

A geofence is a self-defined virtual boundary. You will receive a notification in the Trackimo app when the tracker leaves this area or goes into this area.

To create a geofence
  1. Select the tracker in the Trackimo app.
  2. Click on "Fence".
  3. Click on the "Create Fence" button.

A rectangular fence will be created around your device's current location (or in the center of the map).

  • You can also enter an address to position a fence.
  • You can choose a pre-defined size.
  • You can change the size by making the sides of the rectangle bigger or smaller, or by moving the rectangle.

  1. Once your fence has been created, you can give your geofence a name and click on "Save".

  2. You will receive a notification in the Trackimo app every time your tracker enters or leaves this area. If you want to receive email notifications as well, tap on "Share", then on "New contact". You will then be able to add an email address for this alert.
SPEED ALERT

You will receive a notification in the Trackimo app when the tracker moves faster than the speed pre-defined by you.

  1. Select the tracker in the Trackimo app.

  2. Go to "Settings".

  3. Enable the alert by checking the Speed alert box.

  4. Click on "Save".

  5. If you want to receive a notification via email as well, go to the Settings area in the app, swipe right on the "Speed alert", then tap on "Share" then on "New contact". You will then be able to add an email address for this alert.
MOVEMENT ALERT

You will receive a notification in the Trackimo app when the tracker starts to move.


  1. Select the tracker in the Trackimo app.

  2. Go to "Settings".

  3. Set the "Start moving alert" ON.

  4. Enable the alert by checking the Speed alert box.

  5. Click on "Save".

  6. If you want to receive a notification via email as well, go to the Settings area in the app, swipe right on the "Speed alert", then tap on "Share" then on "New contact". You will then be able to add an email address for this alert.

LOW BATTERY ALERT

You will receive a notification in the Trackimo app when battery level is low.


  1. Select the tracker in the Trackimo app.

  2. Go to "Settings".

  3. Set the "Low battery alert" ON.

  4. Click on "Save".

  5. If you want to receive a notification via email as well, go to the Settings area in the app, swipe right on the "Speed alert", then tap on "Share" then on "New contact". You will then be able to add an email address for this alert.

GPS SIGNAL AND RECEPTION
The tracker uses GPS (Global Positioning System) technology to calculate its current location. It receives signals from GPS satellites in space. These GPS signals can be received when the device is used outdoors or in a vehicle.

The GPS signal is blocked, however, when the tracker is located inside a building or under a concrete roof. The signal may be blocked or diverted even if the tracker is placed near a window. In such cases the device will use an alternative method to calculate its position. The position is determined through identification of a nearby WiFi router or mobile communications antenna. This is less precise than GPS data, and may be hundreds of meters from the tracker. If the device is using a cell-based location (also known as "GSM-based location"), you will be able to tell by a semi-transparent blue circle over the location.

Light meanings

ACTION LIGHT
Switch On:
Press the ON / OFF button and hold for 3 sec.
Green light blinks three times and the tracker starts up.
Press power button: if the device connects with cellular
network or GPS.
Green light turns on for 2 second.
Press power button: if the device not connects with
cellular network or GPS.
Red light turns on for 3 second.
Press power button: if this is the moment when device
is connecting with cellular network or GPS.
Green light and Blue light turn together for 2 seconds.
Short press to SOS/Right/Left button. Green light turns on.
Press the SOS button and hold for 2 seconds. Green light Blinks twice.
Press Right or Left button for 2 seconds. Green lights blinks twice.
Switch Off::
Press the ON/OFF button and hold for 3 seconds.
Red light blinks seven times, the tracker turns off.
Low battery. Red light blinks.
Battery is charging. Red light blinks slowly.
Connected to a power source and battery is fully charged. Red light solidly lit up.

Declaration of Conformity

The Trackimo hereby declares that the TRKM019 tracker radio equipment model conforms with EU Directive 2014/53/EU.
The full text for the EU Declaration of Conformity can be found on the following webpage: www.Trackimo.com/conformity
DISPOSING OF THE PACKAGING
Dispose of the packaging ensuring that materials are correctly separated. Dispose of cardboard and carton as waste paper and dispose of foils via the recyclable material collection service.
DISPOSING OF THE TRACKER
(Applicable in the EU and other European countries with systems of separately collecting waste and recyclables).

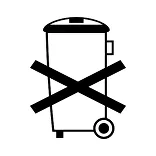
Old devices cannot be disposed of as household waste! If the tracker can no longer be used, all consumers are legally obligated to separate old devices from household waste, e.g. by disposing of them using a municipal/ district collection point. This ensures that old devices are properly recycled and avoids negative environmental impact. Therefore electronic devices are labelled with the symbol shown here. Batteries cannot be disposed of as household waste!

As a consumer, you are legally obligated to dispose of all batteries at a municipal/district collection point or at a retailer, regardless of whether or not they contain harmful substances*, so that they can be disposed of in an environmentally friendly way.

*labelled as: Cd = cadmium,
Hg = mercury, Pb = lead

Environmental Obligations

Green dot system represents that Trackimo fulfils the obligations of the national packaging laws (Packaging manufacturers, fillers, retailers and importers), have jointly decided to find an organization or system to which Trackimo can transfer their obligations. The task of these compliance schemes is to coordinate the collection, sorting and recycling of used packaging.